Like the blog title says, I like to tinker with things that make no sense. I recently got msyelf an irix keyboard for work. Since I like the split design and my MX Blue switches at home make it impossible to listen and write at the same time, I want to build another set.
It’d be boring to just build another iris though. So I decided to go down another route. One that’s more custom. Way more custom…
I had some longan nano laying around. So I decided to base my new keyboard on those. As I soon realized, that’s not supported by qmk. And since I didn’t feel like porting their HAL (chibios) to risc-v I decided to actually build the firmware from scratch as well.
Pick your MCU#
Like the header already says, I have a couple of longan nano at home. Mainly because I read that NVidia bought ARM and decided it’s time to invest into risc-v.
With that, I already had my MCU decided for me. This device is slightly oversized.
- 108MHz clock speed
- 2x I²C
- USBFS on board
- 2x CAN
- Enough GPIOs
If you want to design a more sane device, the qmk website has some advice.
The scan matrix#
In addition to using an ISA that qmk doesn’t support, the actual way to detect physical keypresses is one of the main differences between what I’m setting up and what can usually be found on the internet.
The sane usual way#
The suggested way found online, is to use a scan matrix. The link contains a pretty good explanation, so I won’t get too far into it.
The basic idea is, that we don’t need to know every key exactly at every point in time. We only need to know it up to a human possible resolution. This allows us to do a bit of time multiplexing and save on IO pins.
In practice we get an NxM matrix, that allows us to query N * M keys with only N + M IO pins.
I.e. for 64 keys, we only need 16 pins.
The dumb My way#
If I wanted to follow the well explored ways with open implementations available I wouldn’t learn anything. So I decided to not go that route, but use a more brute force approach. We’ll use 1 GPIO pin for every key we have on the keyboard. While this does sound less smart, which it probably is, this allows me to write an interrupt based firmware. Instead of using a timer to scan the matrix every so often.
Sadly we don’t have 64 (well, I only need 32 pins since I want two halves) pins on our MCU. At least not after deducting USB, JTAG and SPI which we need for communication.
GPIO expander to the rescue. There’s no specific reason I took this one. All I wanted was I²C for addressing and 16bit looked like a good idea. With this, my intended setup is going to have 2 expanders per side. Maybe I’ll upgrade to a single 32bit one, or maybe I’ll downgrade to 4 8bit ones.
From what I’ve seen so far, the tradeoff here is mainly query speed of the entire matrix vs. interrupt precision towards which key was (de)pressed.
Getting started#
First step is, of course, to play around a bit. The MCU is supported by platofrmio. This makes it somewhat easy to get a simple firmware up and running via the dfu loader.
To not go crazy (especially when USB is used for USB) I recommend getting a JTAG debugger and using that for upload and debugging.
The current setup#
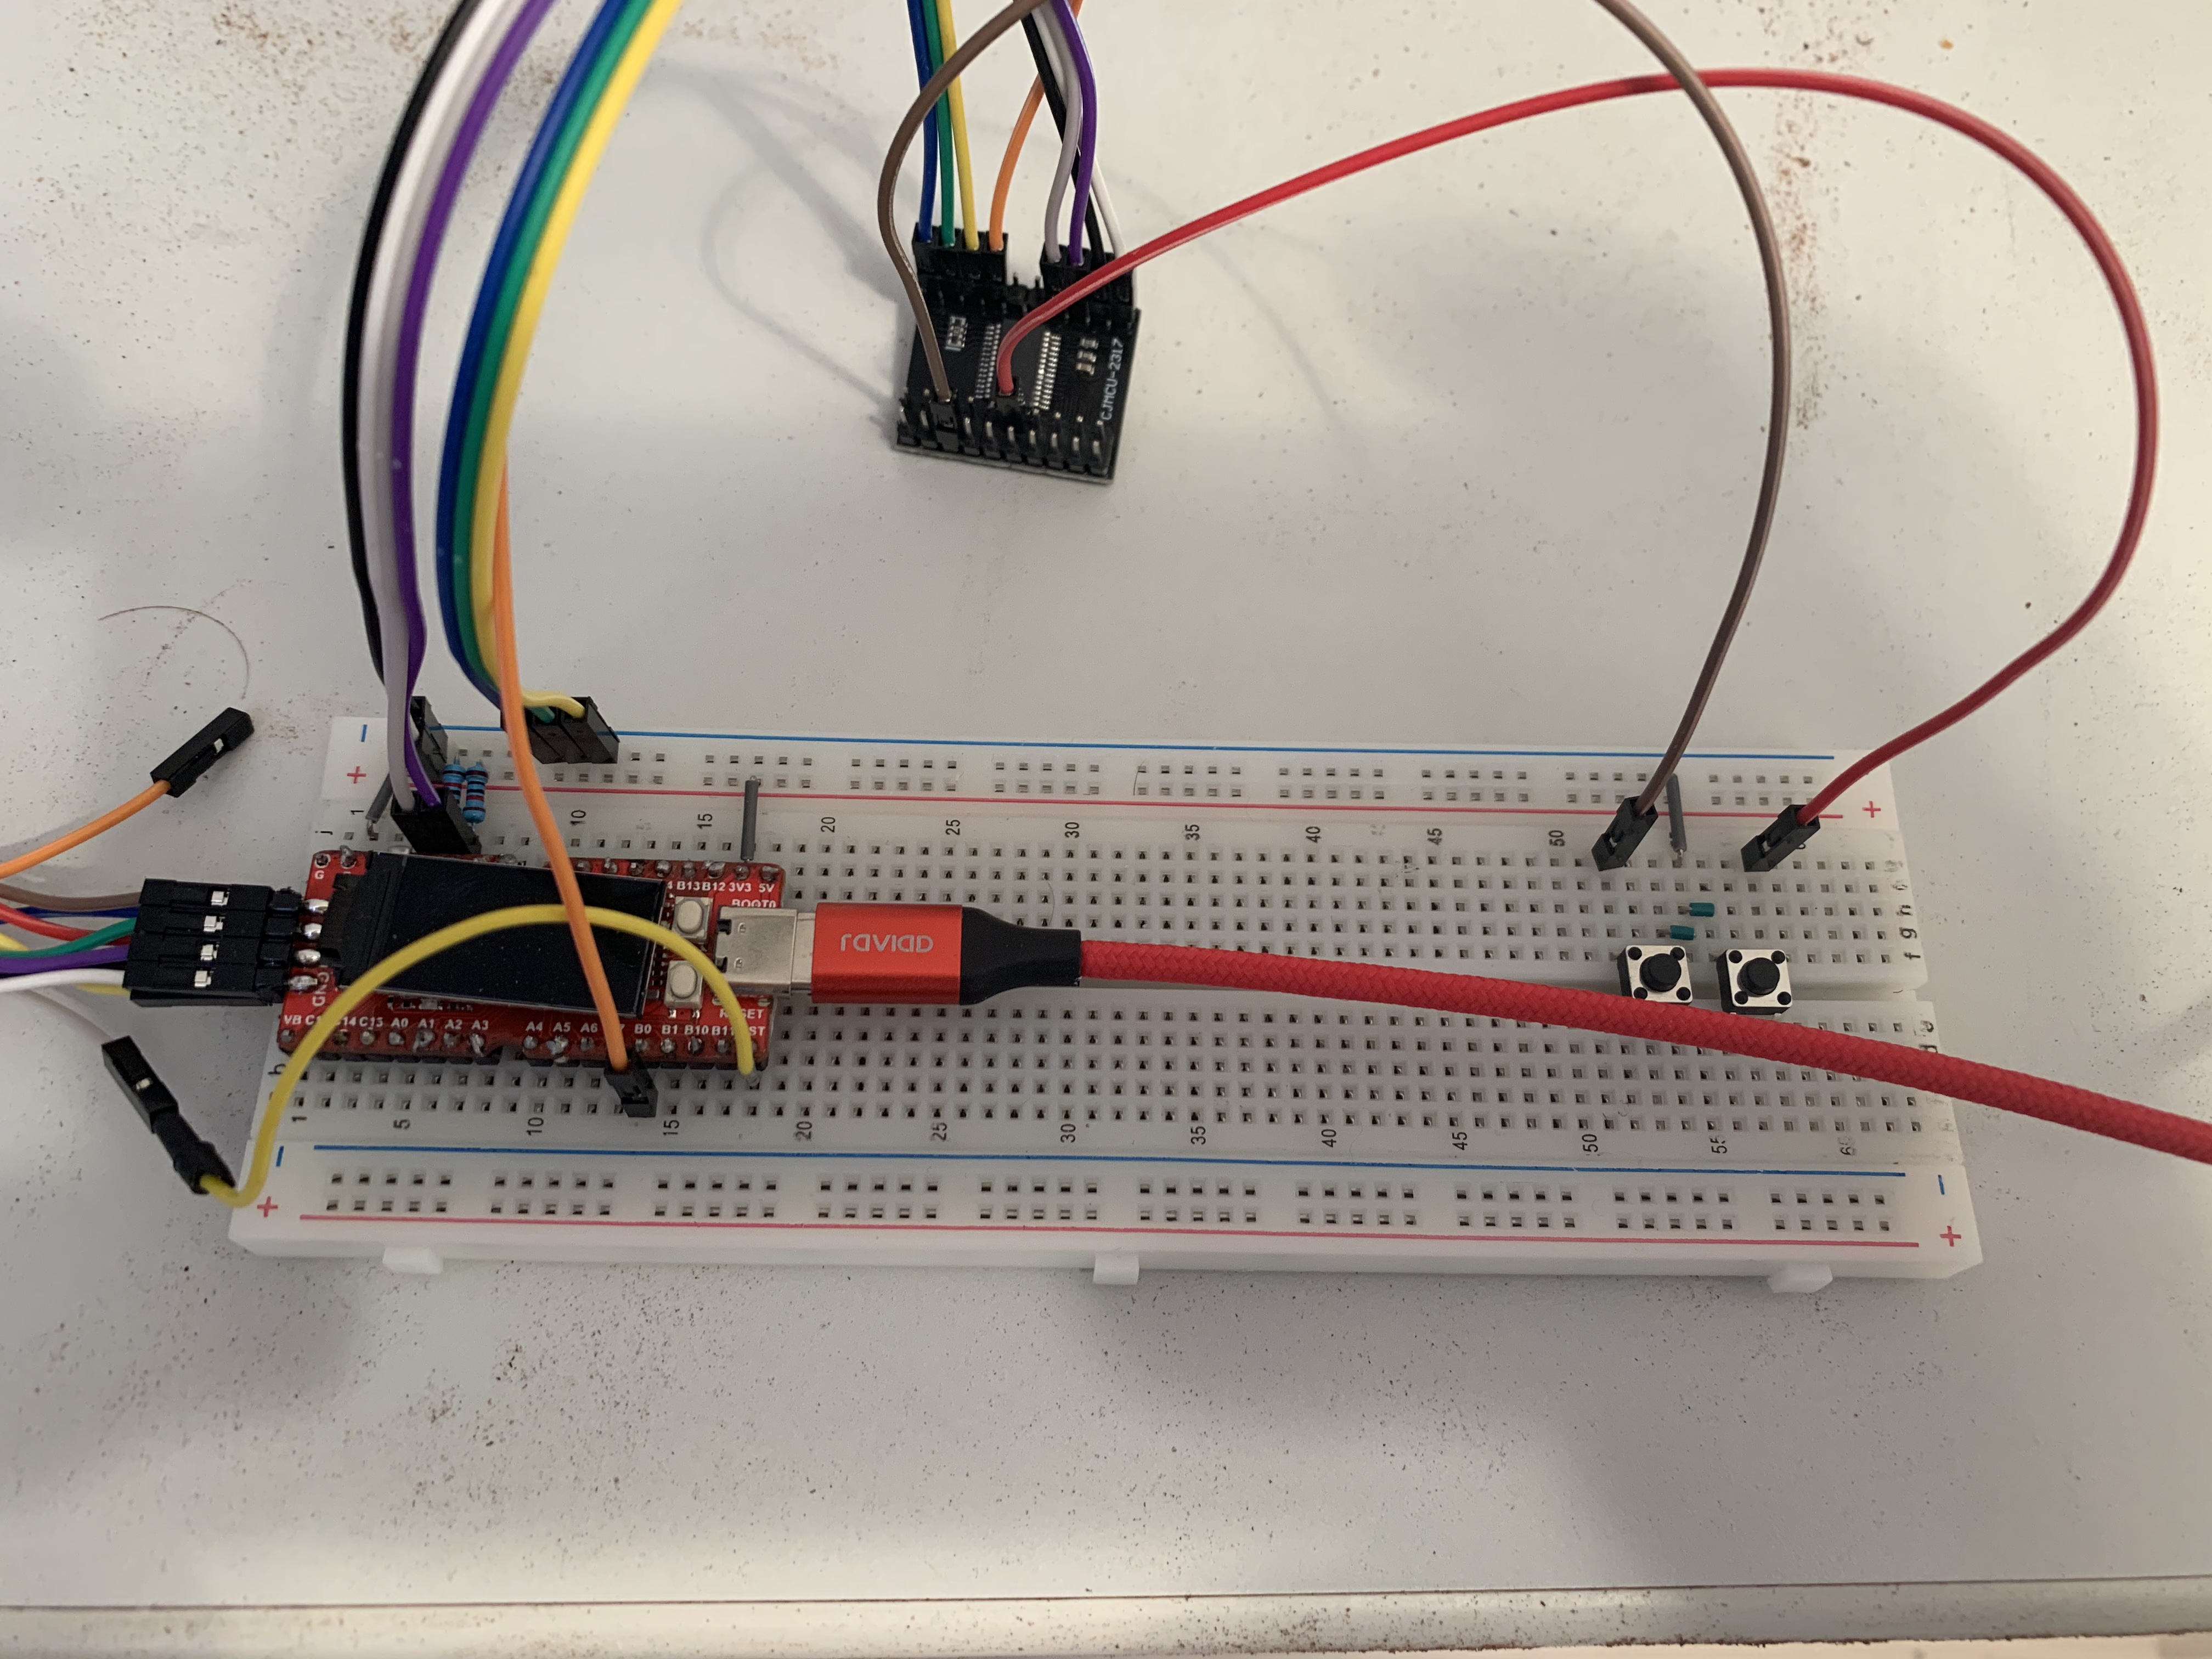
The first image shows the connections towards the test switches I’m using. They are connected to GND on one side and the GPIO expander on the other.
Lefthand side also shows how the GPIO expander is set up. All 3 address pins are set to GND for now. VCC/GND connected to the obvious lines. SDA/SLC for I²C connected to the respective lines on the MCU board.
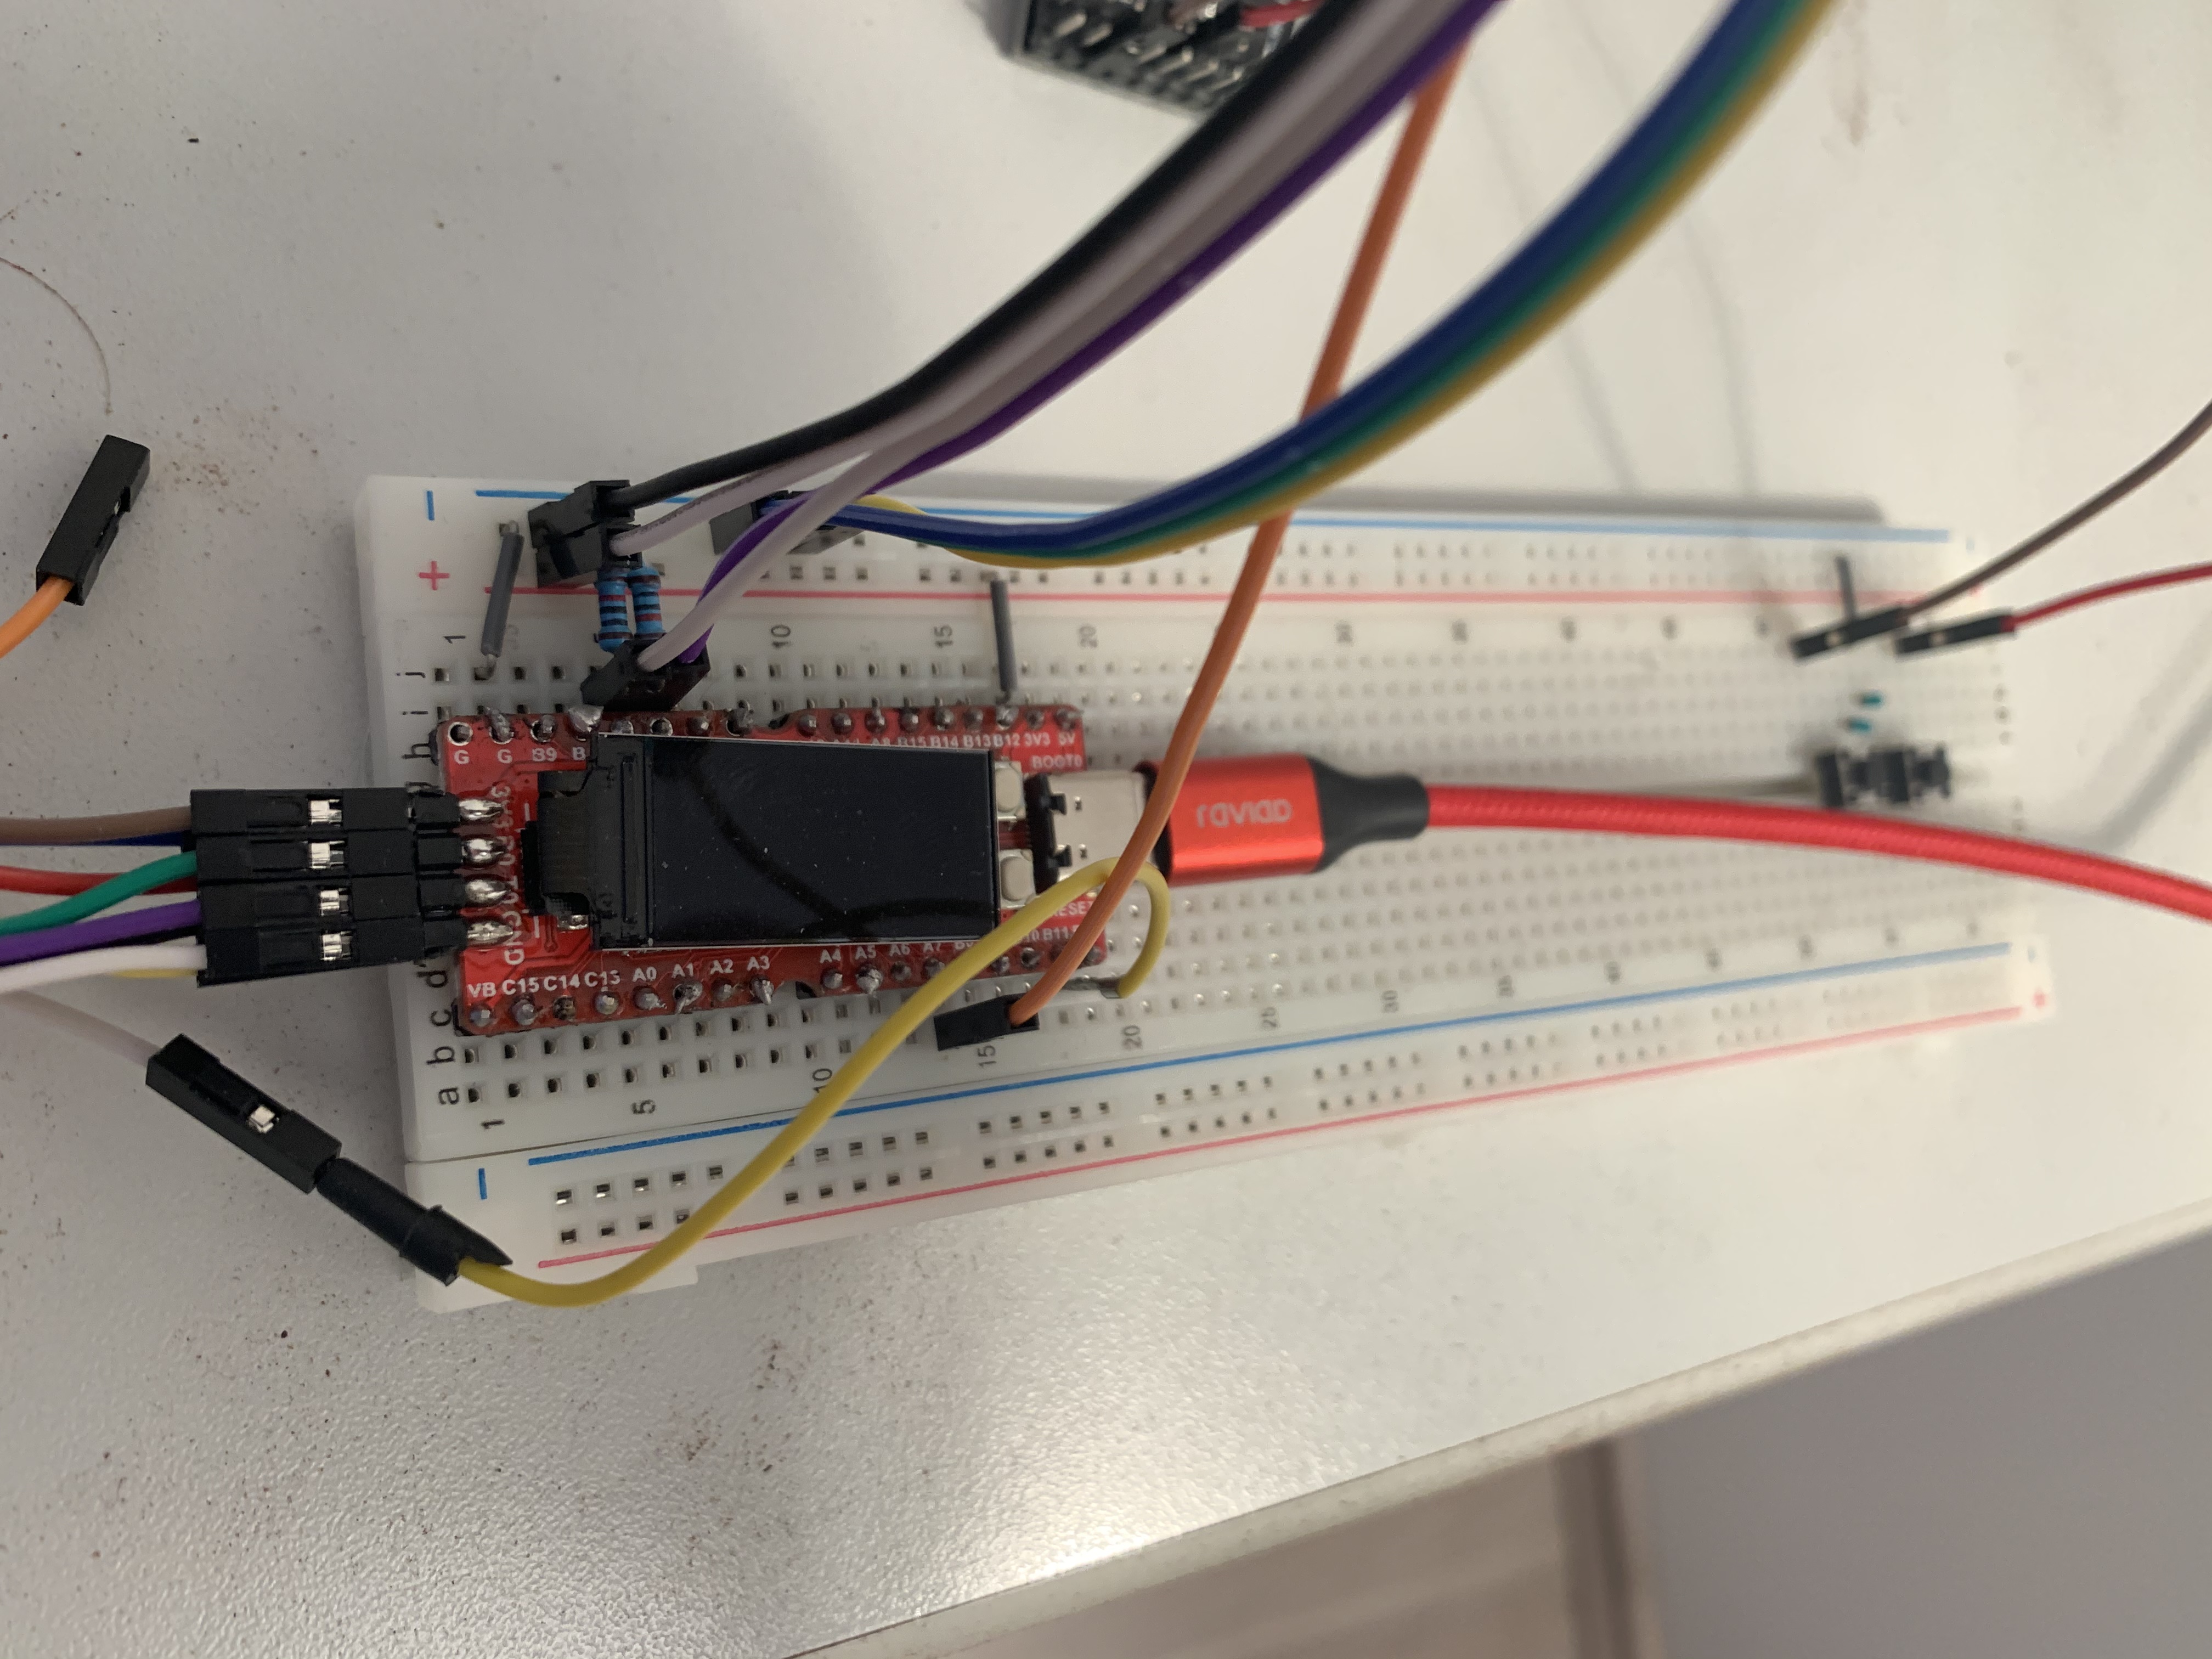
The second image shows the connections to the MCU a bit better. VCC of the breadboard is connected to the 3.3V supply from the MCU. The I²C lines are pulled up to 3.3V with 10kΩ.
Software#
(I’m too lazy to write a proper section here right now. Might expand on it, might keep it this way) The software is available at sourcehut. That current state is just getting USB keyboard up with left and right key on the hardware built as described further up.
Not particularily clean or well structured for now.
Back to Blinky continues with a somewhat annoying debug session. Interrupts ahoi continues with more development after blinky.